A Working Guide to Python Packaging Around a Card Game
I’ve wanted to write about Python packaging for a while, but the right project never came along: my day-job packages are proprietary, and my side projects are web scrapers that I’d rather keep quiet about.
But last Christmas, my YouTube recommendations made me discover a very fun solo card game called Scoundrel, and I thought it would be the perfect candidate for exposing my “best practices” on how to organize and set up a Python codebase to be packaged.
This article will first focus on explaining the game, the packaging design. The following sections will walk through code organization, publishing, testing, documentation, and a few closing tips.
What’s Scoundrel?
Scoundrel is a single-player rogue-like card game created by Zach Gage and Kurt Bieg in 2011. It is a kind of solitaire dungeon crawler that can be played with a classic deck of cards. If you want to better understand the principle, I am sharing the video that YouTube recommended to me about the game.
The game is simple and it seems to have gained a lot of popularity in the past year, based on the YouTube videos I have seen on the topic.
There are many implementations of Scoundrel as a standalone game (steam, itchio) or in Python (benjamin-t-brown, marcs-sus, Lizzard1123) with different aspects that cover the game logic and sometimes add features to train agents.
I decided to work on my own implementation, as I thought it could be a good alternative to my Suika Game aborted/paused project to build a fun environment to train bots. It will be simpler for sure, but the goal of this package is:
- Create a basic command line interface with rich
- Have an environment that can interface with Python scripts/agents easily
- Ability to play the game in headless mode (for agents) or with a UI (for humans)
- Ability to reproduce runs with a seed
- Configuration of the dungeon to stay close to the concepts of weapon, health, and monsters of the game but not linked on the standard card game configuration
- Logging capabilities for analytics and agent training
With that in mind, let’s dive into the codebase structure.
PS: As you will notice, the game logic has been mainly coded by Claude Code, as recoding game card logic is not the fun part of this project. I did that at my job for some balancing project on NFL prime fantasy, so I was happy to let Claude handle that part 😉.
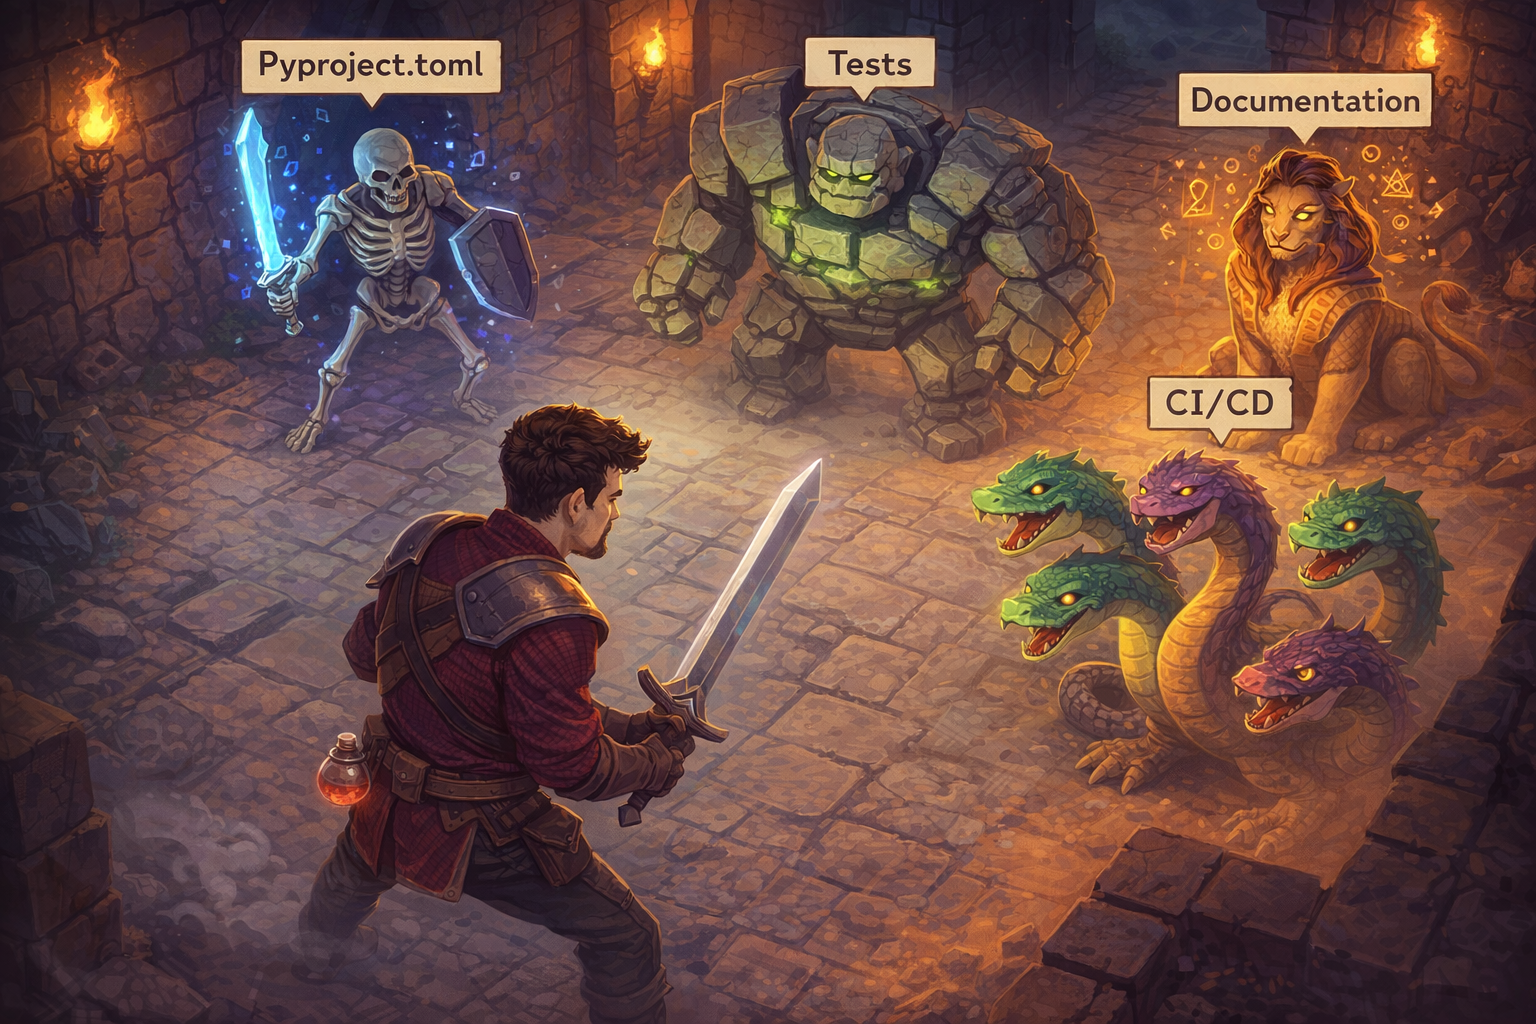
Project Structure, Configuration & Publishing
In this section we will focus on the code organization and how to make the package available to the world via PyPI (THE platform to share python packages).
Project configuration
For this project, I am following the guidelines that can be found on the packaging python website, just adapted for a deployment-ready project.
Here is the overall structure of my project
graph TD
    A[pyscoundrel] --> B[.github/]
    A --> C[docs/]
    A --> D[src/pyscoundrel/]
    A --> E[tests/]
    A --> F[pyproject.toml]
    B --> B1[scripts/]
    B --> B2[workflows/]
The key directories are:
- src/pyscoundrel/ : that’s where all the logic is sitting, we will look a bit deeper into it later, but in it you have all the features from the game logic, UI, agent management, reproducibility, etc.
- tests/ : all the scripts related to codebase testing and integration
- docs/ : where all the docs of the package are sitting
- .github/: all the code for the CI/CD of the project
At the root of all this there is a README.md that explains the purpose of the package and basic feature information, but the most important element is the pyproject.toml file that will glue together the Python codebase, the testing environment and PyPI.
The pyproject.toml is a configuration file containing many different sections to make the package easy to build, test and share:
- [build-system] : defines the build system used to package your code, I used setuptools that is historically one of the most popular but new one are appearing like hatchling or flit_core that could be worth a detour (documentation).
- [project.xxx] : a lot of sections to define various extra information on the package, the most important for me are
- [project.optional-dependencies] : To handle dev environment dependencies
- [project.scripts] : to create a command line interface, I created a pyscoundrel one (more for fun than utility really)
- [tool.xxx] : A series of sections that configure tools used for your package, for example there is a setuptools section to configure the build phase. We will go further into these sections later in the article.
One field in [project] worth a dedicated mention is license. Choosing a license is not optional — publishing a package without one means nobody can legally use it. The most common choices for open source Python packages are:
- MIT: the most permissive and most popular. Anyone can use, modify, and redistribute your code, including in proprietary software, with no obligations beyond keeping your copyright notice. Good default for libraries.
- Apache 2.0: similar permissiveness to MIT but adds an explicit patent grant, protecting users from patent claims by contributors. Common in corporate open source projects.
- GPL (v2 / v3): copyleft — any derivative work must also be released under the GPL. This ensures the code stays open, but it prevents use in proprietary software. PyPI packages under GPL can cause friction for commercial users.
For pyscoundrel I went with MIT: it’s a game library, and imposing usage restrictions would just get in the way. If you are unsure, choosealicense.com offers a clean side-by-side comparison. Once chosen, declare it in pyproject.toml with license = {text = "MIT"} and drop a LICENSE file at the root of the repo — PyPI and GitHub both surface it automatically.
This file is the key to the packaging, and it concludes the codebase organisation. Let’s have a look now at the code structure in src/
Source Code Organization
So here is a simplified representation of the folder
graph TD
    root["pyscoundrel/"]
    root --> init["__init__.py"]
    root --> main["__main__.py"]
    root --> config["config.py"]
    root --> game["game/"]
    root --> agents["agents/"]
    root --> dungeon["dungeon/"]
    root --> logging["logging/"]
    root --> models["models/"]
    root --> ui["ui/"]
    root --> utils["utils/"]

    game --> g_init["__init__.py"]
    game --> g_actions["actions.py"]
    game --> g_engine["engine.py"]
    game --> g_state["state.py"]
(Only the game/ sub-tree is expanded here for brevity.)
The structure contains folders with files holding all the code. In these folders there are __init__.py files that are used to flag folders as importable for Python.
In the folder and in general, modules typically contain class and function definitions as Python supports object-oriented programming, following good practices around code formatting.
I highlight this code to show the important/minimum practices:
- Imports are limited to what’s needed, no
from xxx import * - Imports are in alphabetical order
- Each function/class is documented with a docstring covering the inputs, outputs and a basic explanation
- Input parameters are defined with default values
- No extra-long function declarations
These are the minimum standards; we will go back to them later.
Finally, there is a __main__.py file that ties everything together and makes it possible to run Scoundrel from the command line.
Now let’s go back to the publishing phase.
Build and Publish
With the repository ready, building the package takes two commands.
The build step reads pyproject.toml and produces two files named after the package and version:
- .tar.gz : source distribution containing the code + metadata; pip builds it automatically and transparently during install
- .whl: binary distribution, prebuilt package that can be installed directly
The usual final place for a package that wants to be shared is PyPI, the Python package index. To make it available, the setup is quite easy and you can just follow resources from packaging.python for example to set up your machine and your PyPI space.
The publication is usually done with the twine package and these command lines.
You can find my package at this location https://pypi.org/project/pyscoundrel/
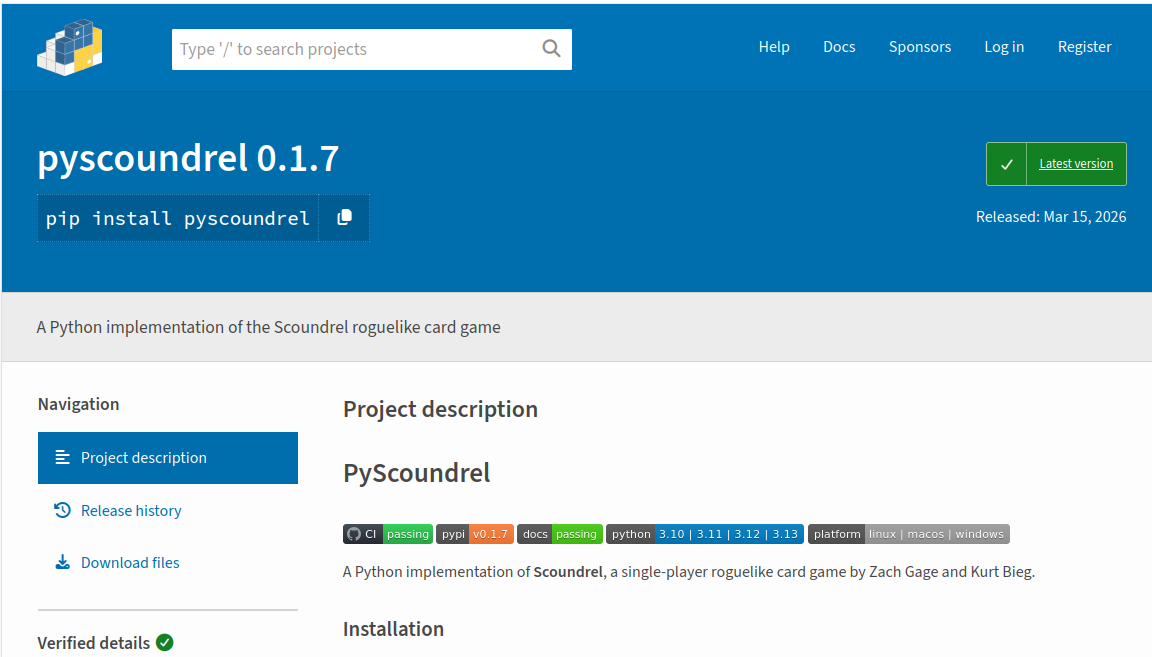
NB: the usual practice is to publish first on testpypi before pushing to PyPI. For this project it doesn’t matter, but for a more widely spread open source project I would recommend validating this practice.
PyPI is definitely straightforward, but once again not mandatory. You can also just share the code on a repo and let people make the installation, or you can host the package on other services (for example at Ubisoft we are users of Artifactory). It’s up to your reality.
So that’s it, you have all the keys to package and share your code… almost. That was just step one. Let’s see how to make it more robust, better tested, and easier to maintain.
Testing
As a package grows, new functions, reorganized modules, and changed defaults appear so manual verification stops scaling. Automated tests catch issues that you’d never spot by hand.
The automated tests take two forms: the first is unit testing, which focuses on testing one element of the package at a time, usually one function of one class. The second is integration testing, which tests multiple elements of the package together, like multiple functions running in an expected order.
Coming from a non-computer science background and working more on the ML modeling side of an AI system, I had struggled to understand why these tests were important and not just a burden to develop on top of the codebase. Former colleagues (Frédéric James, Laurent Boucaud) managed to show me the way by illustrating that these tests should be seen as documentation for your project, not a superficial layer to add for fun.
So in this context the tests should be seen as:
- Unit tests : they are showing you how each function/class behaves with fake situations/data
- Integration tests : they are showing you how each block behaves together in scenarios developed by the package creator, so it presents you with the scope of the package and expected scenarios
It makes the onboarding on a project much easier as the real documentation can focus on drawing an overview of the project, while the tests serve as the detailed, executable specification of the package bricks (unit tests) and how they work together (integration tests).
These automated tests can be done the vanilla way using unittest, but one of the most popular solutions is pytest and that’s the one I am using for this project (with an extension pytest-cov).
All the test code can be found in the tests/ folder with one folder for the unit tests and the other for the integration tests.
If you look more closely at the code organization, you can notice that in the unit tests the folders mimic the code organization in the src folder, as you want to test all the bricks, while the integration is structured around various sets of tests covering different scenarios like reproducibility of a game, logging of a game, etc.
Take a look at the codebase to see how the code is structured in both cases, but what you should keep in mind is that in the end you want assert statements that validate the output of the function or the series of functions tested in a scenario. Here are some basic examples extracted from the tests folder.
I won’t cover test design in depth here, but take a look at popular packages and their test suites like scikit-learn, numpy or pandas , to get a better sense of what you could put in place based on your use case.
The natural follow-up: when should I stop adding tests? Never — or more precisely, only when the package is frozen in terms of OS and/or Python versions and/or functionalities.
The important bit is that you should cover all the possible functions of your package and add new scenarios based on real-time usage and bugs that you encounter. You will not get all the tests right away, it’s a continuous work.
It’s one thing to write tests, but how do you run them? Running pytest from the command line with a few extra flags gives you coverage reports and fine-grained control.
The second option is more detailed as it returns a more detailed view of how the tests are covering the code in the different files. It’s more convenient, and the third variant (with --cov-fail-under) adds a minimum coverage threshold. If the threshold is not met, the pipeline fails.
In the packaging configuration, pyproject.toml also handles test tooling via specific sections:
- [project.optional-dependencies] section with a dev subsection : it gives the ability to add extra dependencies for other purposes like testing or new features in development
- [tool.pytest.ini_options] section that will contain some configuration to run pytest, in this case will run with specific condition
With tests in place, let’s cover the remaining quality checks: formatting, documentation, and security.
Linting, Docs & Dependency Auditing
Beyond testing, a few things are commonly overlooked: code formatting and linting, documentation, and dependency security.
In Python, there are guidelines on how code should look in terms of length, code complexity and formatting. The most widely adopted style guide is PEP 8. To help coders enforce it, there are tools called linters and formatters that scan the codebase and flag non-compliant code.
The most popular is ruff, and the checks are quite simple to set up in your dev environment:
Both commands will return a report on how compliant the code is with the rules, so you can apply the necessary changes.
With clean and tested code, the last step is documentation. Rather than writing everything manually, sphinx can (partially) auto-generate it directly from the docstrings already in your code:
sphinx-build -W -b html docs/ docs/_build/html
That single command builds the full HTML documentation. The output is driven by three things in your docs/ folder:
index.rst: the entry point that organises the navigationapi/: the auto-generated API reference, built from all your docstringsguides/: hand-written markdown files for higher-level explanations that need more context than a docstring can provide
This keeps everything in one place and reuses the code you’ve already written. For hosting the HTML documentation, the most popular option is readthedocs.io, though GitHub Pages or similar services from your repository host work just as well.
One last thing: since your package sits on top of third-party libraries, it’s worth checking that none of them carry known vulnerabilities. pip-audit does exactly that in one command.
Another tool worth having in your belt is vulture, which scans your codebase for dead code like unused functions, classes, variables, and imports. As a package grows and gets refactored, it is easy to accumulate code that is never called. Vulture catches it before it becomes technical debt.
Now that all the bricks are in place, let’s see how to wire everything together with automation.
CI/CD
Running all these checks manually every time you push new code is not realistic. That’s where CI/CD comes in.
CI/CD automates the path from local commit to published release, running every check along the way. In my case I am using GitHub Actions.
The CI is defined in a YAML file. Here is an extract:
The pipeline goes further than just running the checks shown above. After the format, lint and security steps, there is a matrix test that runs the full test suite against Ubuntu, Windows and Mac for Python 3.10 through 3.13, to make sure the package is cross-platform and version-agnostic.

The CI/CD also handles publishing: a separate workflow pushes a new release to PyPI, and a step in the main CI keeps the docs up to date. To manage versioning I rely on git tags combined with bump-my-version, which updates every version reference in the codebase in one command.
Version numbers follow semantic versioning: MAJOR for breaking changes, MINOR for new backward-compatible features, PATCH for bug fixes.
Let’s finish with a few final points to keep in mind when writing a Python package.
Badges, Logging & Git Hygiene
The first thing that struck me when browsing well-maintained Python packages was the row of status badges showing at a glance whether CI is green, which Python versions are supported, and what the latest release is.
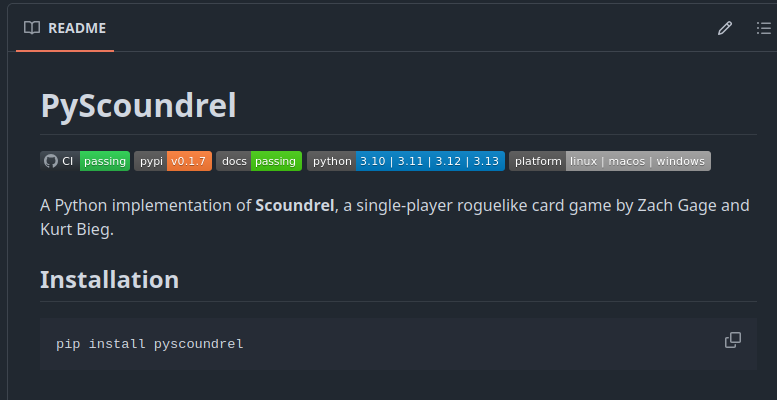
Adding them is straightforward: CI, PyPI and docs badges pull their status directly from the pipelines, while Python version and platform badges are set manually. These are just the basics, enough to give anyone visiting the repo a quick read on the package health and os/version coverage.
A question that always comes up: print or logging? For a package, always use logging. Unlike print(), it gives you severity levels (info, warning, error…), context, and lets the caller control what gets shown. print() has its place, just not in a package 😉.
This article covered the main tooling, but a few git-native features are also worth knowing about: gitleaks to catch secrets before they reach the repo, and git hooks and pre-commit to automate checks at commit or push time.
Finally, when should you actually bother packaging versus just sharing a script? My rule of thumb comes down to three questions:
- Reuse: will you use this code across multiple projects? If yes, a proper package pays off quickly.
- Audience: are you sharing with people outside your team? A versioned package is far easier to distribute than re-sharing raw files every time something changes.
- Contributors: are others involved? A package enforces structure and makes onboarding easier.
Wrap-Up & Next Steps
This is my take on the minimum viable setup for a Python package. Seasoned developers will certainly have more to add, but I hope it gives anyone starting out a compact and practical foundation.
On the AI assistant side: Claude was a real contributor to this project, handling most of the game logic while I focused on testing and deployment. It took a few iterations to get the game logic right, but for everything around tests and CI these tools are genuinely strong when you give them clear guardrails. The bar for what a solo developer can ship has gone up.
I plan to keep exploring Python packaging through open source work by reviving old projects like pysuika and experimenting with new ones like folio.
Thanks for reading and feel free to reach out if you have any questions.
References
The Game
- Scoundrel — original rules (PDF) — Zach Gage & Kurt Bieg
- Scoundrel Solitaire — Steam
- Scoundrel — itch.io
- benjamin-t-brown/scoundrel — GitHub
- marcs-sus/scoundrel-cardgame — GitHub
- Lizzard1123/scoundrel — GitHub
Python Packaging
- Choose a License — choosealicense.com
- Python Packaging User Guide — PyPA documentation
- Packaging Python Projects tutorial — PyPA documentation
- PyPI — Python Package Index
- TestPyPI — Python Package Index (test instance)
- twine — PyPI
Testing
- unittest — Python standard library documentation
- pytest — official documentation
- pytest-cov — PyPI
- scikit-learn test suite — GitHub
- numpy test suite — GitHub
- pandas test suite — GitHub
Code Quality & Documentation
- PEP 8 — Style Guide for Python Code — Python Enhancement Proposals
- ruff — GitHub
- Sphinx — official documentation
- Read the Docs — official site
- pip-audit — PyPI
- vulture — GitHub
- logging — Python standard library documentation
CI/CD & Git
- CI/CD — Wikipedia
- GitHub Actions — GitHub
- bump-my-version — PyPI
- Semantic Versioning — semver.org
- gitleaks — GitHub
- Git Hooks — Git documentation
- pre-commit — official site
Other Tools
- rich — GitHub
pyscoundrel Project
- pyscoundrel on PyPI — PyPI
- pyproject.toml — GitHub
- tests/ — GitHub
- CI workflow — GitHub
- Release workflow — GitHub
Author’s Other Projects
- Suika Game — foundations article — The Odd Dataguy
- pysuika — GitHub
- folio — GitHub