
A few weeks ago, I watched Andrej Karpathy’s video, Let’s Build GPT: From Scratch, in Code, Spelled Out, where he builds a GPT-like model and uses a dataset called Tiny Shakespeare, which I think he created himself. The video is really interesting, but while watching it, I was thinking, “Yeah, anything Shakespeare is usually not my cup of tea” maybe it’s my French genes, who knows…
So I started wondering: Could I build a tiny, personal dataset that would mean more to me?
A few weeks ago, I gave it a try and managed to create something more personal. At first, I only planned to share the dataset, but I thought this journey might be worth sharing, as I had some interesting findings with LLMs along the way. So let’s start with the source for my dataset: Kaamelott
Kaamelott whattt ?
Kaamelott is a French comedy TV show inspired by the Arthurian legend. It aired from 2005 to 2009 and has 6 seasons. The first 4 seasons have a short format, with episodes around 3 minutes long, totaling 400 episodes. The last 2 seasons have a longer format, with episodes lasting between 50 and 60 minutes (depending on the editing). It goes beyond the classic ‘six seasons and a movie’ joke borrowed from the tv show Community — with one movie released and two movies in preparation (there are also multiple comics in the Kaamelott universe).
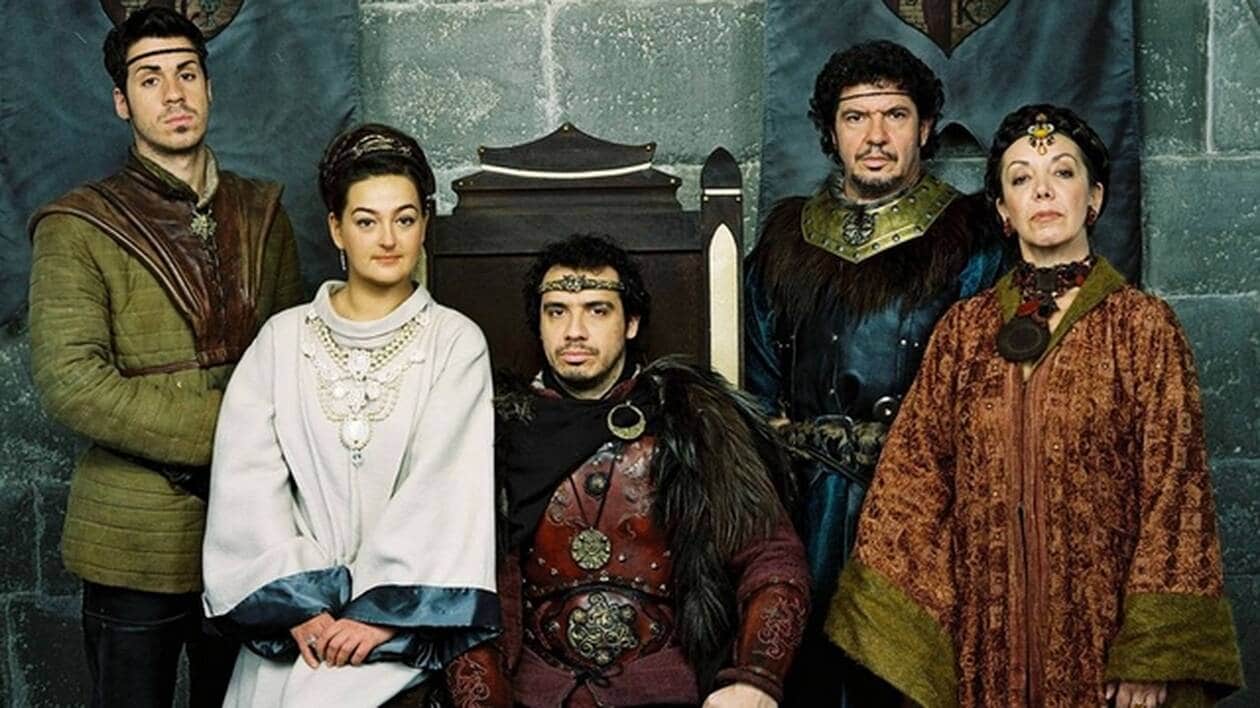
[The picture doesn’t do justice to how funny the show is!]
The show is very popular in France and if you are curious to see the TV show, there is a link to an official YouTube channel with all the episodes.
I’ve always been surprised that there isn’t a dataset for this show (at least not complete), so I decided to build one. I wanted to keep the same format as an old project I had about Doctor Who, which was a collection of scripts for each season of the show (and adding a ‘tiny like’ dataset)
To do this for Kaamelott, I had two options: scrape the official scripts that can be bought (in Kindle format, for example) or use a community website called kaamelott.hypnoweb.net with a community that transcribed all the episodes (kudos to them for the amazing work). I chose the second one: used the community site and scraped the website using patience and Selenium to extract all the raw HTML content for processing. I wanted to collect the scripts in a specific format with one line per speaker, including:
- The character who spoke
- The dialogue spoken
- The parenthetical: all the context about the character and dialogue (ie tonality of the dialogue,etc)
To process the raw HTML, I started using various regex and data cleaning techniques, but the output was meh at best. For example, some dialogues between characters were not split properly, and to properly extract the parenthetical, I had to create very complex rules to get a result that was still far from perfect. So after a few days, I thought, let’s try using the Large Language Model (LLM) path and see how it goes.
PS: I am sure that if I had kept working with my classic approach, I would have managed to get something decent - I just found the LLM approach more fun

[Sorry in advance—I’ll use a lot of Kaamelott GIFs in this article]
From zero to few shot prompting
I am not going to explain what LLMs are, there are good resources/series online that explain what it is like 3Blue1Brown, Andrej Karpathy or ScienceEtonnante if you prefer an explanation in french.
For this project, I had to choose which LLM family to use. There were multiple options like DeepSeek, LLaMA, or GPT, but I decided to focus on cloud models since running them on my local machine was not very efficient. To give you an idea, my first attempt to parse with a local model was with DeepSeek-7B via llama.cpp took about 10 minutes for one line (and there are more than 30,000 lines to process).
I chose to focus on OpenAI and Mistral, OpenAI was an obvious choice but I chose Mistral as well since the dataset was based on a French TV show, and I couldn’t go without a French provider, I was also curious to explore their tools like le Chat, la plateforme and their xxxstral models.
My first attempts were a bit brute-force, using their chat interfaces, ChatGPT and le Chat but the results were good, and the models performed well with a very short prompt. So I decided to use their APIs to automate the process, since I wasn’t going to manually parse more than 400 scripts through the UI. The goal was to use a more structured prompt workflow.
Here’s the typical prompt I used for parsing.
This approach is called zero-shot prompting, where you are asking the model to produce output based on a task description with a prompt that explains what to do. Nothing fancy—just a simple example to show what was expected.
The results were solid, the models worked well even with short prompts, but there were a few issues:
- Pricing: I did a quick calculation. When testing with GPT-4, it would cost between 50 cents and 1 dollar to process one episode from the first season. With more than 400 episodes, the total cost becomes high. There were options to
- Batch calls to reduce the cost of inference by half, but it’s still too expensive.
- Apply smaller models that are less expensive, but the results were not so great
- Output control: In some episodes, parts of the output were missing—some lines were skipped and not processed at all.
A first improvement was to tweak the prompt sent to the model, and move from zero to a few-shot prompting.This technique helps teach the model how to solve a task by providing a few examples before making the processing prompt, which helps guide the output. There is an illustration of the examples used for few-shot prompting.
I used the message-based format by creating a sequence of user/assistant message pairs with all the examples.
This technique is powerful, but one of the main drawbacks is the size of the input that you’re providing, as you pay for both input and output tokens when you are generating text. Using many few-shot examples can make the request expensive (OpenAI seems to offer an automatic prompt caching mechanism to make it less expensive).
To reduce costs, I decided to explore another method called fine-tuning, which adapts a smaller model to a specific task using custom data.
Fine-tuning
Fine-tuning is a technique inspired by the development of deep learning models, where a pre-trained model is adapted to a new task, which can be referred to in the literature as transfer learning.
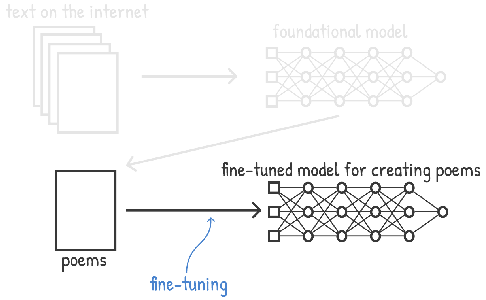
(Thanks to Chris Albon and its AI flashcards on fine-tuning)
There are plenty of applications that use this method, but the main ones are in computer vision, where you repurpose an image classifier for another task. For example, in this paper, they repurposed a model trained to classify ImageNet classes to detect pneumonia in X-rays (data that are not part of the ImageNet dataset).
Model providers like OpenAI or Mistral offer supervised fine-tuning features directly on their platforms, with just a few clicks.
The process is simple and includes these steps:
- Choose the model to fine-tune: In my case, I used small models like Mistral NeMo and OpenAI’s GPT-4 Nano.
- Define fine-tuning criteria: You need to specify the task type, number of epochs, and learning rate.
- Provide training and validation sets: These datasets must follow a specific format required by the model provider.
- Monitor the fine-tuning process: Track the loss to optimize training. Usually, this is a cross-entropy loss for text completion, which compares the probability assigned by the model to the correct next token with the actual ground truth token in the sequence.
OpenAI is offering fine-tuning that goes beyond supervised methods, with:
- direct preference optimization, which can align a model with human preferences using ranking data ( like chosen vs rejected completions).
- reinforcement fine-tuning approach linked directly to the development of AI agents , with rewards etc

To build my dataset, I followed Mistral’s guidelines and selected my samples from all seasons, choosing lines that sometimes included more than one dialogue to extract. I collected 500 samples for the training set and 50 for the validation set. The labels were generated using few-shot prompting and manually (quickly) verified. The datasets are saved in .jsonl, which enforces a clean JSON dictionary structure for each line—something required for the fine-tuning.
OpenAI and Mistral offer two close ways to fine-tune models, here are some things I learned from my tests:
- Fine-tuning was fast on both platforms, but Mistral was faster (less than 5 minutes).
- OpenAI and Mistral offer a few parameters to adjust during fine-tuning: number of epochs, learning rate, and batch size (batch size is only for OpenAI). OpenAI also has automatic parameter selection, which I used in my case.
- Mistral can fine-tune for text completion and classification
- OpenAI also provides better logging and real-time tracking of accuracy and loss
- I found Mistral more transparent about the cost of the operation and model deployment than OpenAI.
- Mistral also includes an additional metric for text generation called validation mean token accuracy (the number of correct tokens predicted), which I found more informative than the loss alone.
- OpenAI seems to have a legal check at the end of the fine-tuning to respect their terms of use
In the end, the best fine-tuned model was from OpenAI, with a loss of 0.098, while Mistral NeMo was around 0.67 (I chose the fined-tuned model from mistral with the best performance). Based on this benchmark, I decided to stay with the fine-tuned GPT Nano.

The final touch
So finally, to process my data, I decided to use few-shot prompting in addition to the fine-tuned GPT Nano model. Why? After some quick calculations, I saw that processing all six seasons would cost me between $15 and $20, taking about 1 hour per season without batching the calls so well within my budget.
During the data parsing, I added a validation layer with a retry mechanism. The goal is to validate the content (in terms of format and fields) in the output and to avoid breaking the post-processing.
OpenAI, for example, offers the ability to enforce output’s structure, but I still think it is good to add a deeper validation of the structure to avoid surprises in the process.
So, now with all the data processed in the LLM, everything is perfect? Not really.

Specifically, there were some issues with the character field. Some parentheticals were not processed properly. I had to add a mapping layer for about 400 characters that were processed too roughly, to extract the name and parenthetical. I built a large mapping that also normalizes the character names across the seasons (like “Dame Seli,” “Seli,” etc.).
I used some data cleaning functions that I originally developed for the project. But to be honest, my original file processing without an LLM had more than 1,200 character names that were not processed correctly, so the LLM still did a good job.
You can find the final dataset in Kaggle or Github. I also took the liberty to add the URL of the related episode on YouTube, which I fetched from the YouTube API and matched with the episode information from the extract of the Hypnoweb website.
Closing notes
As you can expect, the next steps will be to work with the dataset and make some project about NLP and generative AI. I am currently working on text embedding and RAG mainly for episode discovery. I will also wait for feedback to improve the dataset, as I’m sure the transcription is not perfect.
More generally, working with LLMs for this project highlighted a few things:
- Proper benchmarking is essential: I only did a basic one here, and I think it’s important to be able to quickly switch model providers to test the prediction’s quality. Don’t overlook the possibility of running models locally when feasible.
- It all comes down to cost, accuracy, and time: For this kind of project, you can keep costs low if you’re smart (and remember not to use the automatic top-up balance feature of your account).
- Having a good annotation pipeline really matters: In my case, it was simple, but being able to quickly create samples for few-shot prompting or datasets for fine-tuning is key to fast iteration. Fine-tuning is now just a few clicks and API calls away, so you need to be efficient at creating data.
