
In this article, there will be an overview of the service of AWS Sagemaker. The idea will be to see from my DS perspective how the service can solve data scientist bottlenecks encountered during the development of an ML system.
Description of the ML situation
To test the service, I am going to put myself in the following situation: I am a data scientist working for the website hearthpwn, a community website where members share decks for Hearthstone’s card game.
My current development setup is an old Linux machine with the current setup:
- CPU: Intel(R) Xeon(R) CPU W3565 @ 3.20GHz
- RAM: 16Go of DDR something (nothing recent)
- GPU: Lol, what did you think
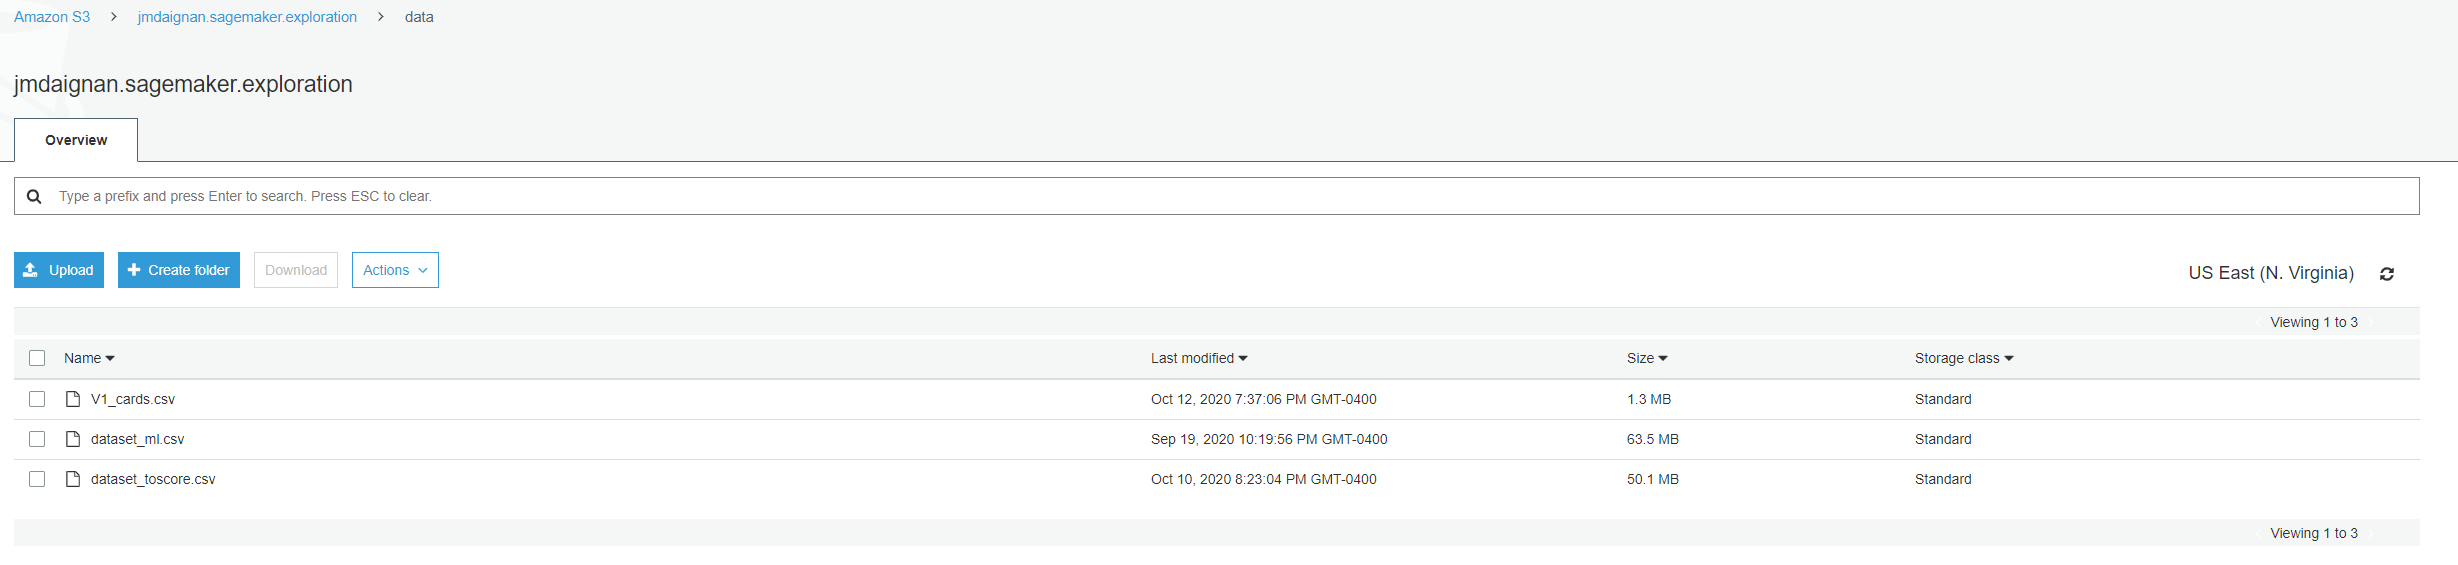
I need to work on a deck classifier because most of the users are not associating a deck with an archetype, and it’s degrading the navigation on the website.I currently have a pipeline built by data engineers, dumping with a process every day the decks scored and the deck to score and some information on the cards.
This use case is mostly a copy cat of the one I used in my article for metaflow, just reworded for the article.
I developed an elementary proof concept to build a deck archetype estimator; you can find the code here. The steps of the process are:
- Processing: Collect the data from two files, one for training the model and a sample of data to score and make the encoding necessary on the data used to train a model, evaluate it and the data to score.
- Training: Train, the most dummy random forest model with scikit-learn
- Evaluating: Make some evaluation of the accuracy of the model with some custom metrics (a total legacy from my recommender process and maybe not useful at all, but who cares)
- Scoring: Score the scoring set with the model and build a prediction
So now what are my problematics as a data scientist:
- I need computing power (more powerful CPU, access to a GPU) because my local machine is outdated, and I need to test some other models quickly without dealing with all the environments etc.
- I need to run my code remotely to build a model and make predictions daily.
- I need to explore a little bit more my data, but I have no time.
And that’ where AWS Sagemaker can help me to compete with these problems.
ML ready machine needed !? : Sagemaker Notebook instances and Sagemaker studio
The easiest way to obtain a machine ready to do ML or DS works is to use the notebook instance of Sagemaker. The setup is relatively easy from the AWS portal.
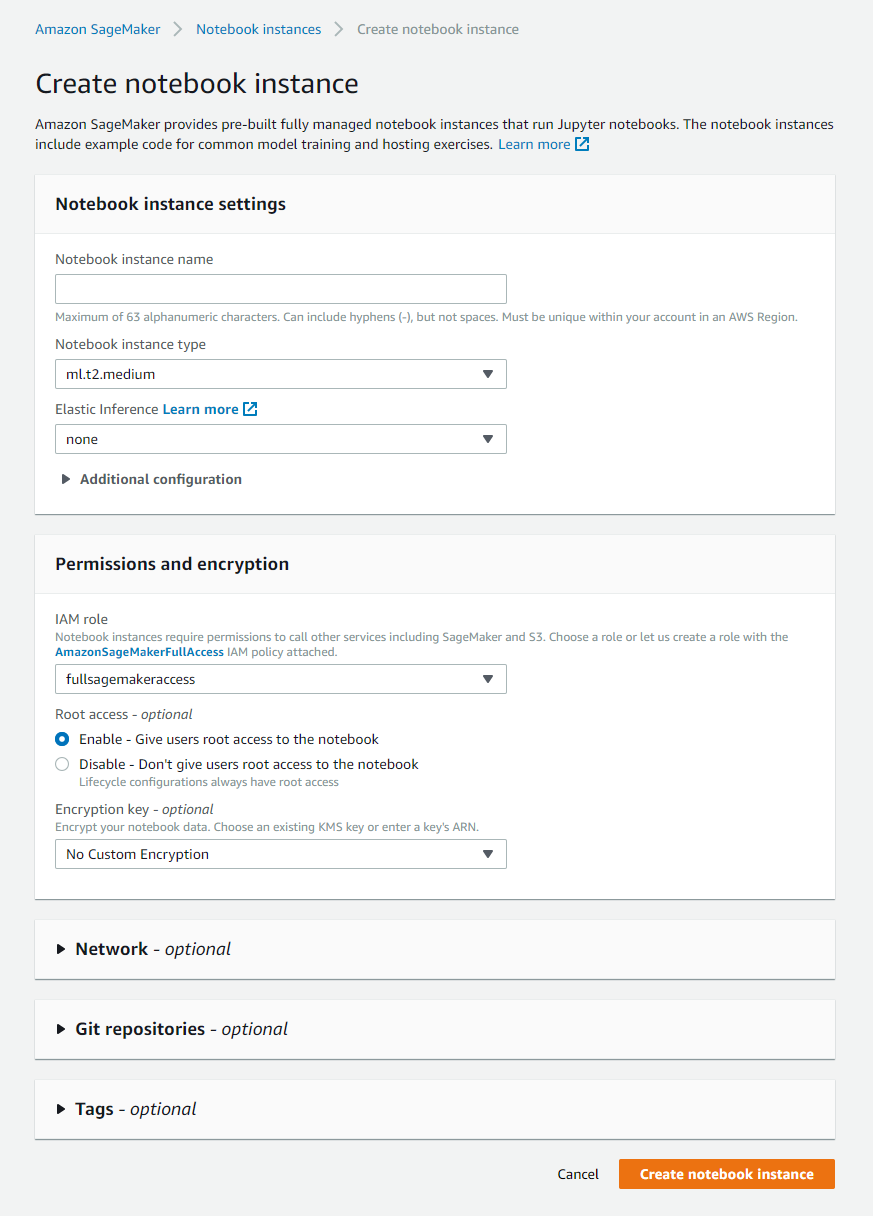
The notebook instance offers the ability to:
- Select the machine that you can need to run your calculation (total control on his setup; there is an overview here of what is available)
- The available disk space
- Give some role to access other services of AWS (in my case, I used the full sagemaker access)
- Connect the instance to a repository (code commit or from other services like Gitlab)
- Control on the connectivity (vpc, etc.)
In my case, I decided on my experimentation to launch an m4.large (very standard machine). Still, as you can see on the naming of the available instance, it has a prefix ml, and this is the illustration of two things interesting:
- The machine is accessible per the Jupyter or Jupyterlab portals.

- The image installed on the machine is ubuntu ready to use ML image with many kernels prepared to do ML processing (with or without GPU feature if the device has one).
These kernels look identical to the one available in the deep learning AMI, an image useable on every AWS machine and up to date on the libraries’ version available.

The first setup is a little longer, but after that, the notebook instance is easily stopped and restarted in less than 5 minutes, and one crucial thing is that no data lost after a reboot (workspace persistence). But there is a hic, all the data saved sure, but everything system-related like creating conda environment, environment variables are lost after a reboot. Still, Amazon is smart, and they develop a feature to “save” this kind of information, and this called lifecycle configuration.
These scripts are used when you start (restart) the notebook or at the instance’s initialization to set specific system elements for the user. As you noticed in my case, I put an environment variable related to the location of the data on S3. With this lifecycle configuration, I can say at every start to define the environment variable AWS_SAGEMAKER_S3_LOCATION.
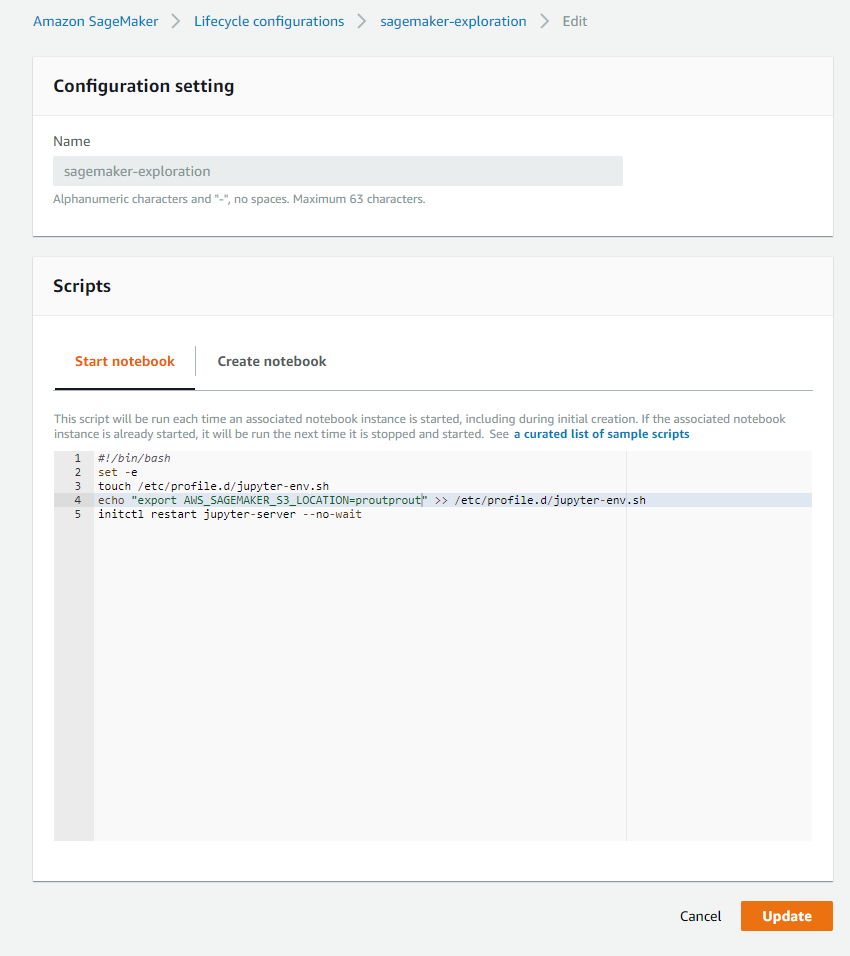
There are plenty of examples in this repository to set various elements like a conda environment.
The notebook instance is a cool feature and can help data scientists easily set up the infra for GPU calculation, parallelization etc. In our case, there is a valuable gain switching from our local machine to the m4 large. There is a comparison (on ten runs) of each phase’s duration for each machine type.
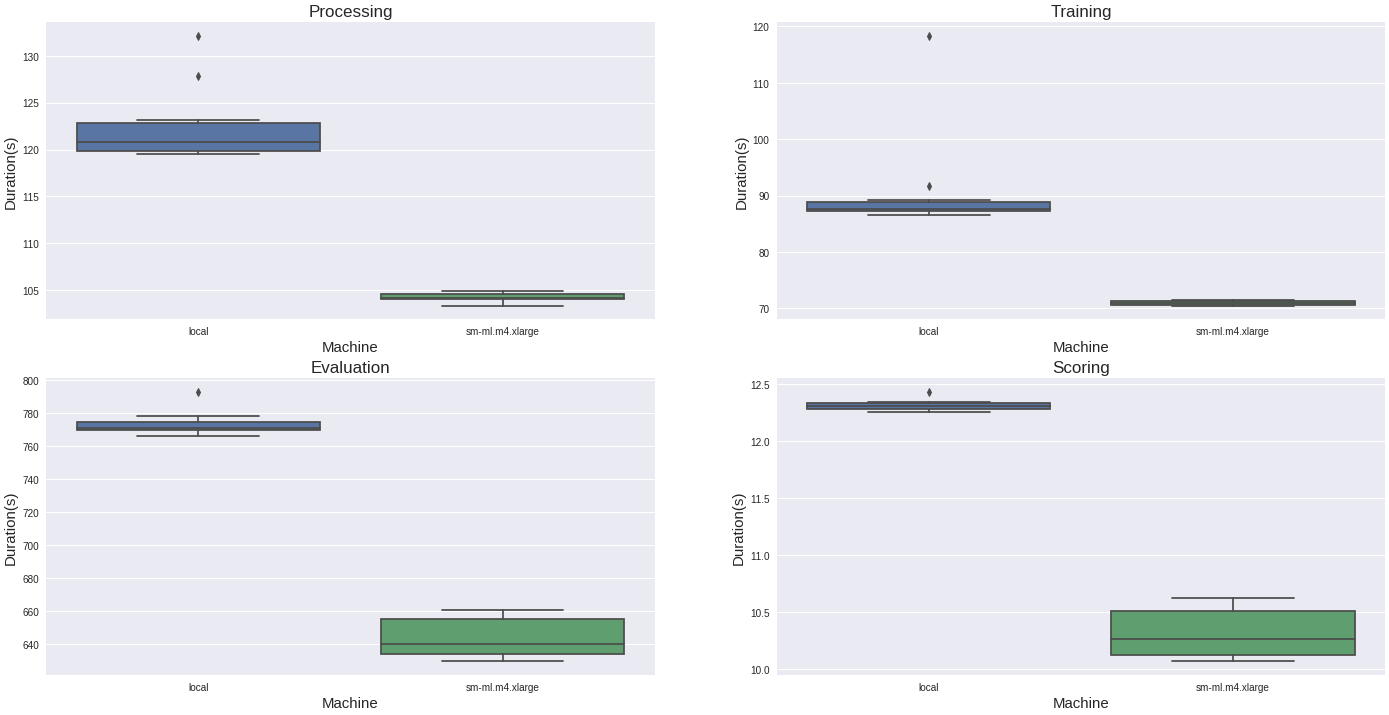
The machine switch offers a decrease of 20% in computation time on each phase, so that’s good.
But Amazon released another solution to interact with notebooks and EC2 instance, and it’s called Sagemaker studio, but this service mitigates me. It’s interesting because it’s offering all the things related to the notebook mentioned previously. With a twist, you can launch multiple machines in function of your need for each kernel.

(like in this case, I decide to use another type of machine with my TensorFlow kernel)
The machine’s choice looks limited, and I feel that it’s a money hole when executing some tests. Still, I am guessing that this service targets a company that has to manage multiple users who need to change machine regularly in their needs.
Interesting really, but still, I prefer the classic notebook instance.
Let’s have a look now for the Sagemaker jobs.
Execute ML code remotely!? Sagemaker jobs
In my case, I would like to execute the different pieces of my code from my local machine but without using resources that are on the cloud, and this is where the Sagemaker jobs can help. You can found all the code that I built here, but this tutorial inspires the overall process. For this article, I will focus on only one part to explain the concepts behind the jobs.
Let’s start with the mechanism that is going to trigger the job remotely.
There are two main points on the code:
- The definition of the processor: In this case, our code uses a scikit-learn processor (but there is one for other frameworks); you can select the version of the framework and on which machine it can run. The processor, when it’s going to execute jobs, is going to run a machine with the version of scikit learn needed (I am presuming it’s container-based and built on top of AWS batch)
- The execution of the processor: From the initialization, there is mainly three parts to this execution:Location of the code to execute, the inputs (ProcessingInput) that are defined by where is located the data (locally or remotely) to used and where it will be on the machine that is going to run the code, the outputs (ProcessingOutput) same logic as the input and the parameters: You can add parameters/arguments for your execution
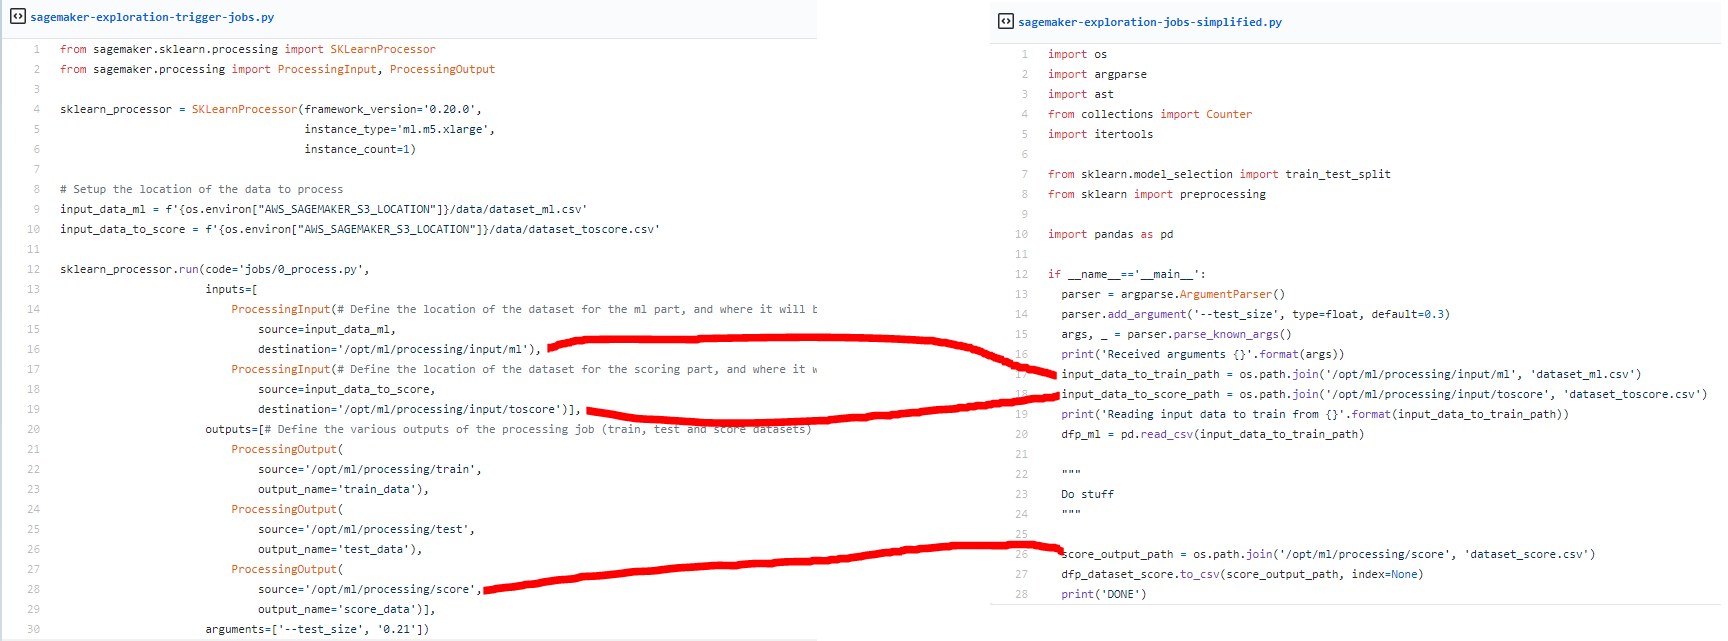
Let’s have a quick look at the job format.
There’s not too much a big deal; just have to update how to handle the input and the output by simple declarations that will point to the input/outputs define by the destination/source previously (there is a quick schema to connect the two scripts).
Honestly, I find the jobs’ process simple and straightforward and full of potential to do a grid search with this process without blocking a machine to do it. And another cool thing is that you can collect information on the outputs and the job’s overall execution (useful to connect job).
And in terms of performance of this service, I will be honest at machine equivalent on Sagemaker the jobs are a little bit longer because there is the setup of the machine, but it’s not a crazy increase (like 10% more time).
Suppose you look more at the tutorial that I mentioned previously for the training job, I used a trainer job. In that case, it‘s very similar in terms of input and functionality, but on the execution, the trainer’s job seems slower. On the notebook, the mean value for the training times is around 72 seconds on the trainer jobs; it’s about 372 seconds; I guess that the jobs can be used in an inference context, so their setup is quite different but honestly, use just the processor and not the trainer of the framework.
And to finish, let’s have a look at a kind of assistant feature to data scientist, the autoML component of Sagemaker
Need assistance !? Sagemaker autopilot and experiment
The autopilot is one of the features that has been released last year. This feature makes echo to this a movement called autoML in the machine learning world. The idea is to give the data to a system, this data has to be composed of all the available information to make the predictions, and most important which column has to be predicted and the system will do all the features engineering and estimation of good model candidates to make the prediction (basically the job of a data scientist).
What and you want to promote that !? Yeah, why not, I will advise you to read this article of Bojan Tunguz that draws a good portrait of the autoML problematics. Let’s go back to the autopilot service.
I will not show my experiment in detail, but my trigger notebook is here; but I followed this tutorialand the result is quite impressive.
After a few minutes, the script is offering you two notebooks, one with some analysis of the dataset and one with the predictor for the problem related to the dataset; I will have to invite you to have a look at it, but basically:
- The first notebook shows some operation done on the input (with some stats); in my case, the dataset was quite simple, so no real features engineering, but if you launch the process in thisarticle’s data, you will see more details features engineering.
- The second notebook is more the process behind the construction of a model to build a multi-class predictor and all the model that is used (and how to serve it quickly)
Honestly, I am finding the initiative cool. It’s easy to set up, but I am unsure that it’s super impressive. In terms of processing, this is kind of the same thing done from a dataset to another (brute force xgboost) with a big machine, and the input dataset size could not exceed 5Go (and that’s small from my point of view). Another point to keep in mind is that this autopilot feature is directly embedded in the Sagemaker studio with the concept of experiment.
Still, I think this approach could be another way to build a baseline model to compare with some other approaches build by humans (with more details in the features engineering and the prediction) and find the right fit.
Conclusion
Overall my exploration of AWS Sagemaker has been enjoyable; I found that AWS really tackles what could be needed for a data scientist to work in the cloud (easy machine spotting, ready to ML image and trigger remote work).
But there is plenty of other services in Sagemaker that I didn’t use:
- The human workflow: to offer the ability to annotate and evaluate the prediction by a human (still the best annotation and verification tool)
- The marketplace: Place where you can use a pre-trained model (free or by paying them), kind of cool to do some transfer learning in the DL area.
- The inference jobs to execute batch prediction job and live prediction, exciting, but I am thinking that a production level pipeline has more constraint than a model serving behind an API (but cool that’s here).
To conclude, and I want to be clear on this service, there is a counterpart of all this easy to use service, a Sagemaker taxes basically for a similar machine for a notebook instance you are paying 40% more. AWS is not a ‘sponsor’ for people that want to do ML, and there is plenty of services to start to work on ML DS stuff with a little cost (Kaggle or Google Colab). This tax is not a bad thing for me, really, but just keep that in mind.
Bonus : Interact with AWS services from Slack with AWS Chalice (and the slack API)
By writing this article, I was sick of always going on the portal, entering my two-step code go in the sagemaker menu to launch the notebook instance (using portals is boring when you have to go in a lot of windows, put code etc. every time). I decided to see the effort to deploy an application that will do all the interaction between AWS and a service that I am using on a day to day workflow like Slack (I heard it was hard).
I dig a little bit on the internet and my work based on these two resources, an article by Paweł Hajduk and another article of Yogesh Ingale around the usage of AWS chalice with Slack.
I knew a little bit about Chalice; it’s like a mix between Flask and Zappa (that was my super combo a few years ago to deploy API on AWS). I tried it a few years ago to save my ass at the end of a sprint when I decided to deploy a feature (and my PM told me not to do it 😀). This package is super exciting and invites people who may not be familiar with API to look at it to experiment with it.
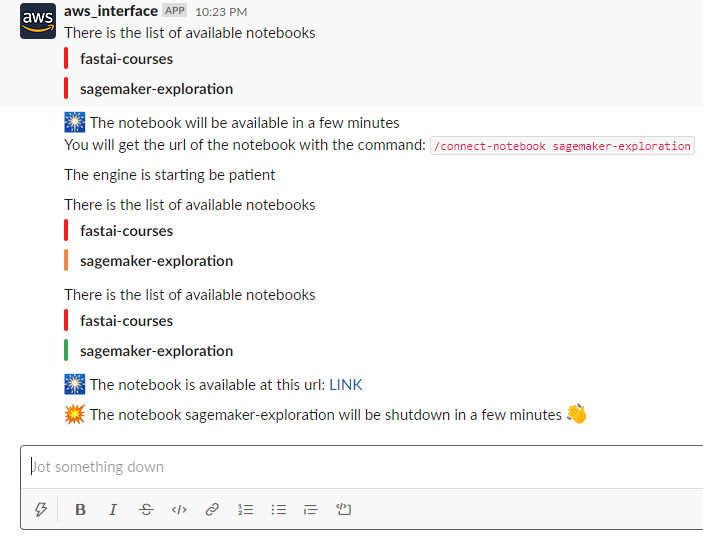
The process for this application is straightforward; I built three endpoints for three slash commands:
- Start_notebook, slash command to list the status of all the sagemaker notebook instance, and if a valid name of a notebook is given, the notebook will be started.
- Connect_notebook , slash command to get a pre-signed URL to connect to a running notebook instance.
- Stop_notebook , slash command to stop a running notebook instance.
There is here the result of some interaction with the application.
You can find the code of my application in this repository and there is a demo of the commands used here.


